No knead sourdough
A foolproof guide to making the simplest of sourdoughs from scratch, courtesy of Bread Ahead
Recipe Meta
Prep
3 days
Cook
2 hours
Serves
Makes 1 loaf
Difficulty
Medium
Ingredients
- 500g strong white bread flour, plus extra for dusting
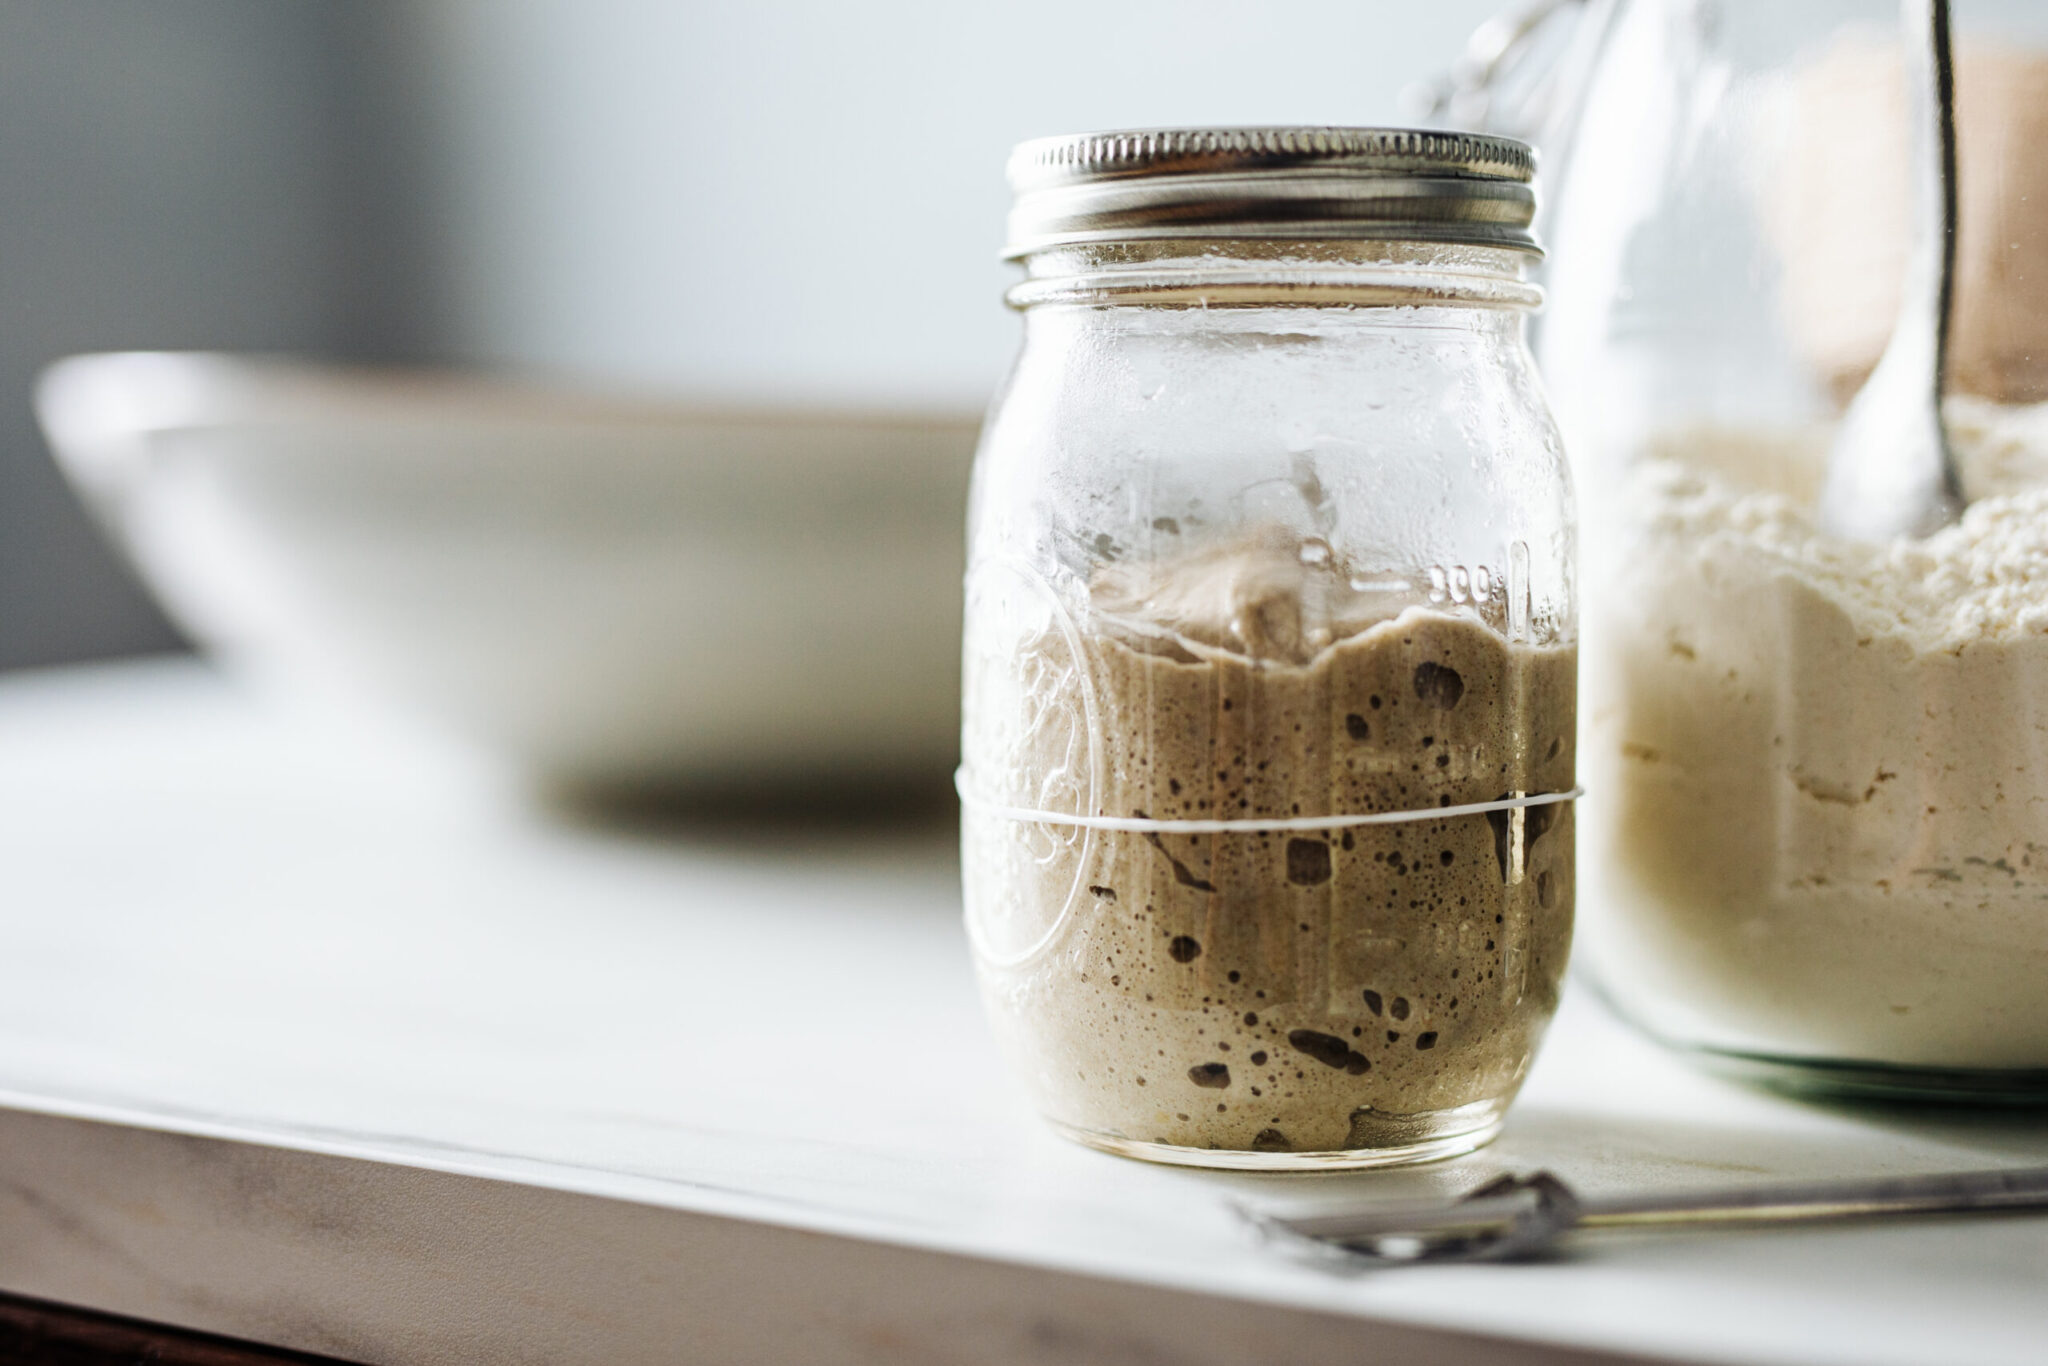
- 150g rye starter
- 350g water
- 11g fine sea salt
- Semolina, for dusting
Equipment
- A Dutch oven (cast-iron casserole) or a baking stone
- A water spray
- A baker’s peel or a wooden board
Method
Day 1: Place the flour in a large mixing bowl. In another bowl, add the starter to the water and mix (your starter should float in the water). Make a well in the centre of the flour and pour in the liquid.
With your hand like a fork, gently bring the dough together (don’t overmix—at this stage you just want to combine until the flour has cleared). Cover and leave at room temperature for 1 hour.
In this recipe, we use the delayed salt method. This gives your starter time to become active and your flour time to absorb water before the salt is added.
When the hour is up, uncover your dough and place the salt on top. Sprinkle a little water over the salt, then gently start pulling the salt through the dough. This should take about 30 secs, at which point you should feel your dough start to tighten up slightly.
Cover your dough and place in the fridge for 12-24 hours.
Day 2: Take your dough from the fridge and uncover. It will be a lot firmer now and will be starting to resemble a fully mixed dough.
You now need to give your dough a fold. This will start to develop the gluten, reactivate the yeast and put air pockets into the dough. Rest it for half an hour, then give it another fold. Rest for another half hour, then take your dough out of the bowl and give it a gentle pre-shape. Cover and leave for 10 mins.
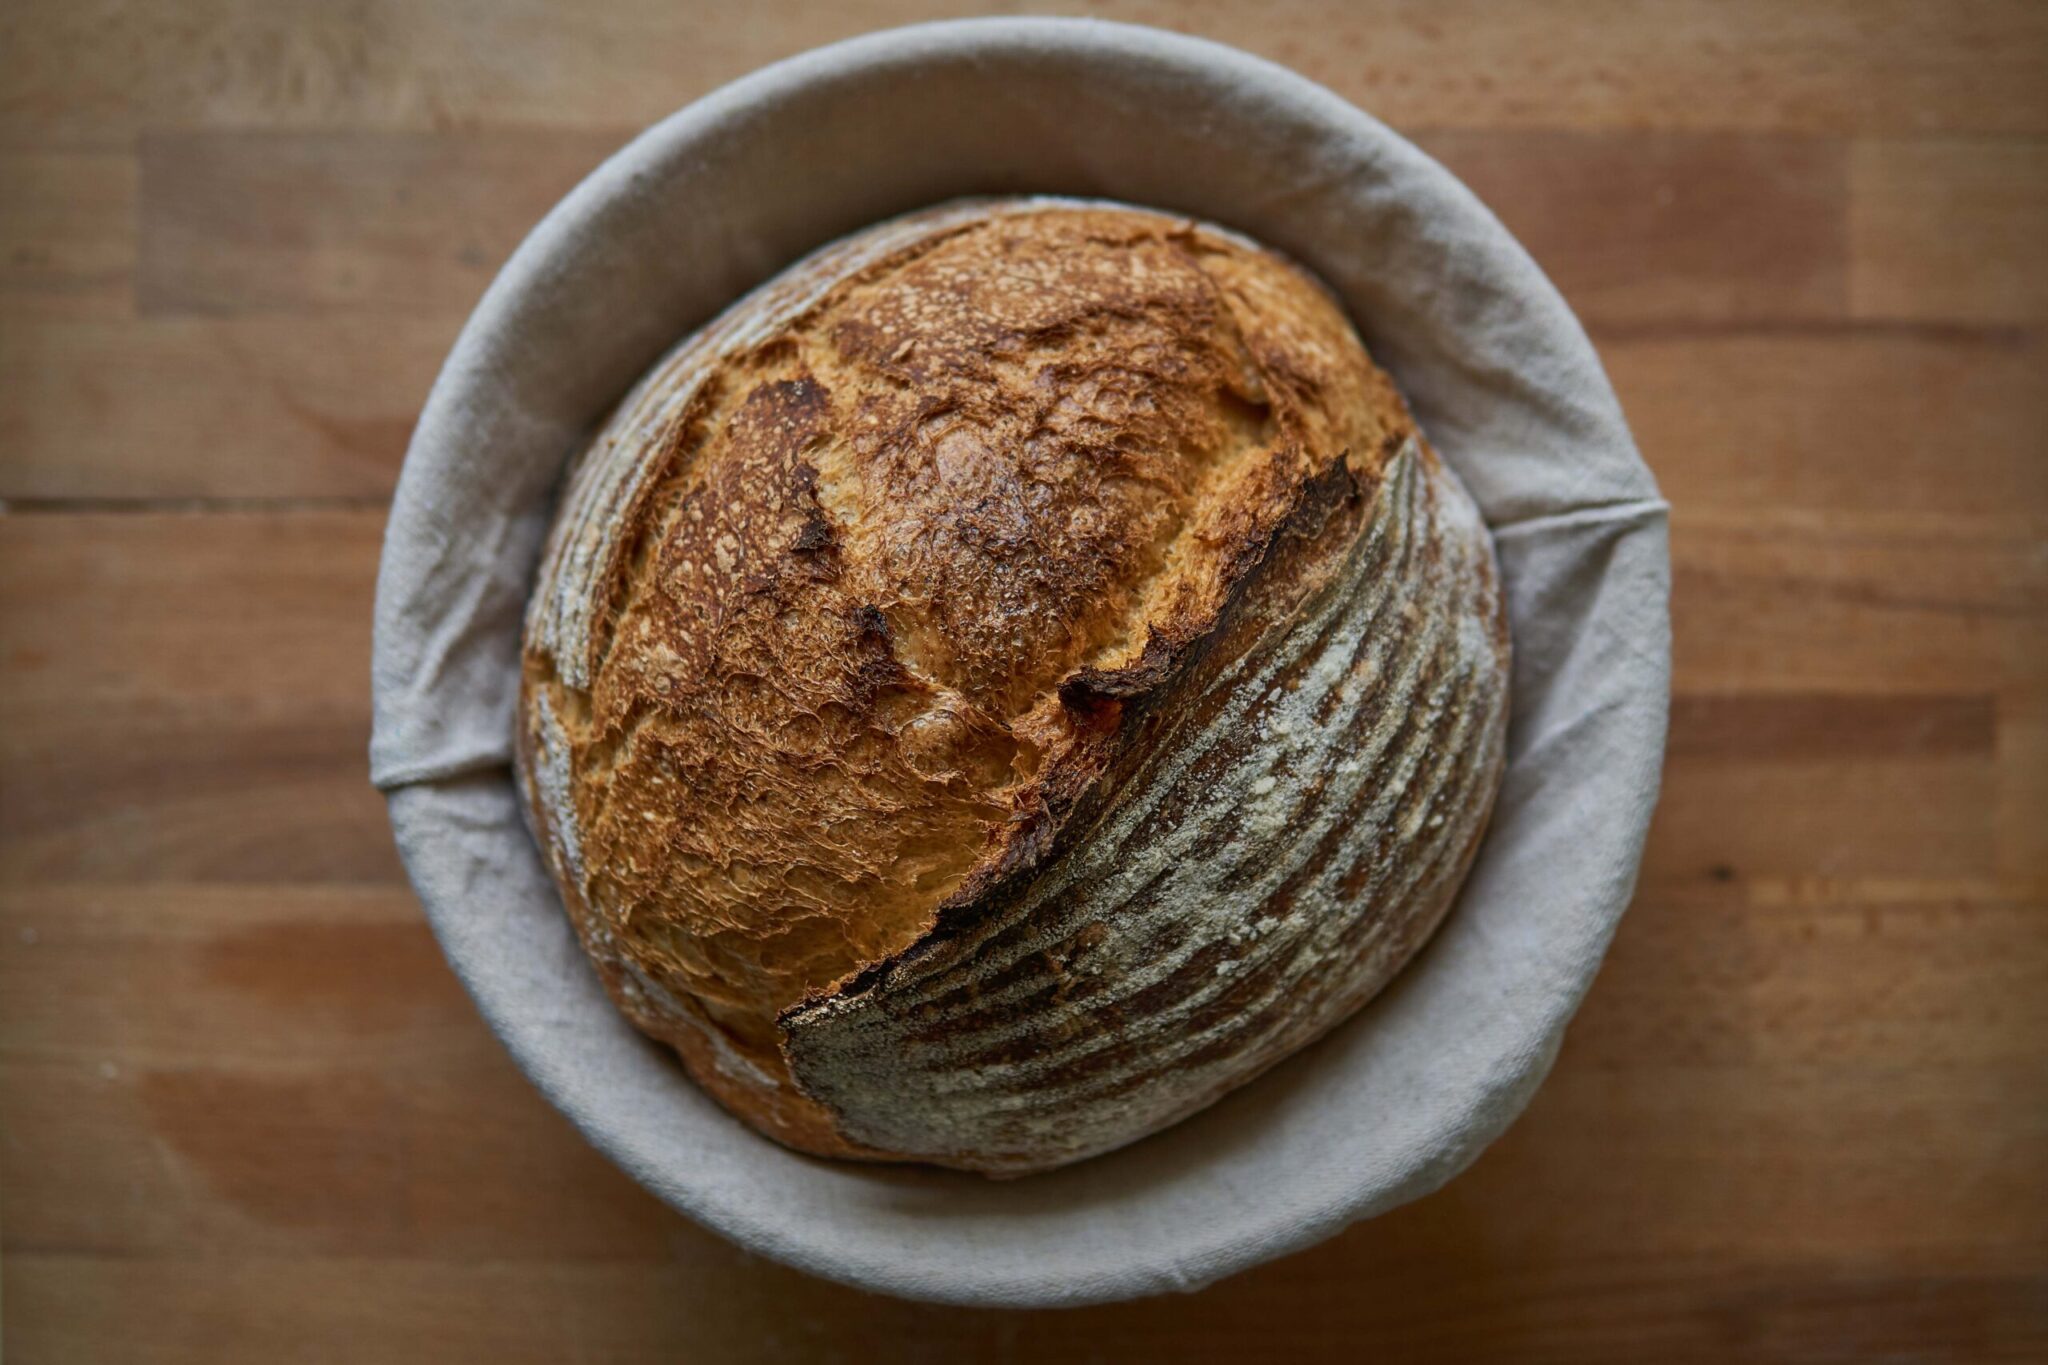
Heavily dust your proving basket with flour, then shape your dough into a nice tight round by bringing the outside edges of your hands together (palms facing up) underneath the loaf as you turn it on your work surface. This will create good tension in the loaf.
Place the dough upside down in the proving basket and leave to prove for 1 hour at room temperature. Cover and place in the fridge for another 8-12 hours.
Day 3: Take your dough out of the fridge and leave it to rise for about 2 hours.
Preheat your oven to 250C, or as hot as it will go.
Once your oven is ready, put a Dutch oven (cast-iron casserole) or baking stone in to heat up. Get your water spray ready if you are using a baking stone.
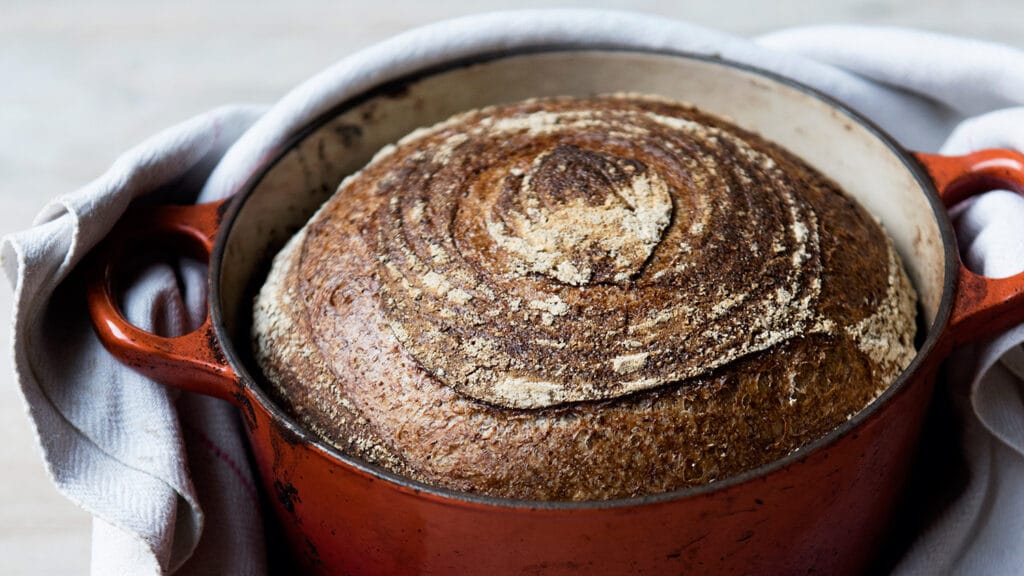
If using a Dutch oven, very carefully take it out of the oven. Sprinkle the loaf with semolina and gently place top side down in the Dutch oven. Using a razor blade, cut two slashes in the dough. Put the lid on, place in the oven and bake for 35 mins, then remove the lid and bake for a further 25 mins. Take the Dutch oven out and very carefully remove the loaf, then put it back into the oven, directly on the oven shelf, and bake for a further 10 mins, depending on how much singe you like.
If using a baking stone, gently and slowly turn out your loaf on to a baker’s peel or a wooden board. Using a sharp knife or a razor blade, cut two slashes on the top of the loaf, then slide it off the peel on to the baking stone in the oven. Heavily spray inside the oven with your water spray, and bake for 30 mins.
After 30 mins, turn the loaf round and bake for a further 25 mins, depending on how much singe you like. Once baked, place on a rack to cool.
Image: Issy Croker
Recipe from Baking School: The Bread Ahead Cookbook by Matthew Jones, Justin Gellatly and Louise Gellatly (Fig Treet)